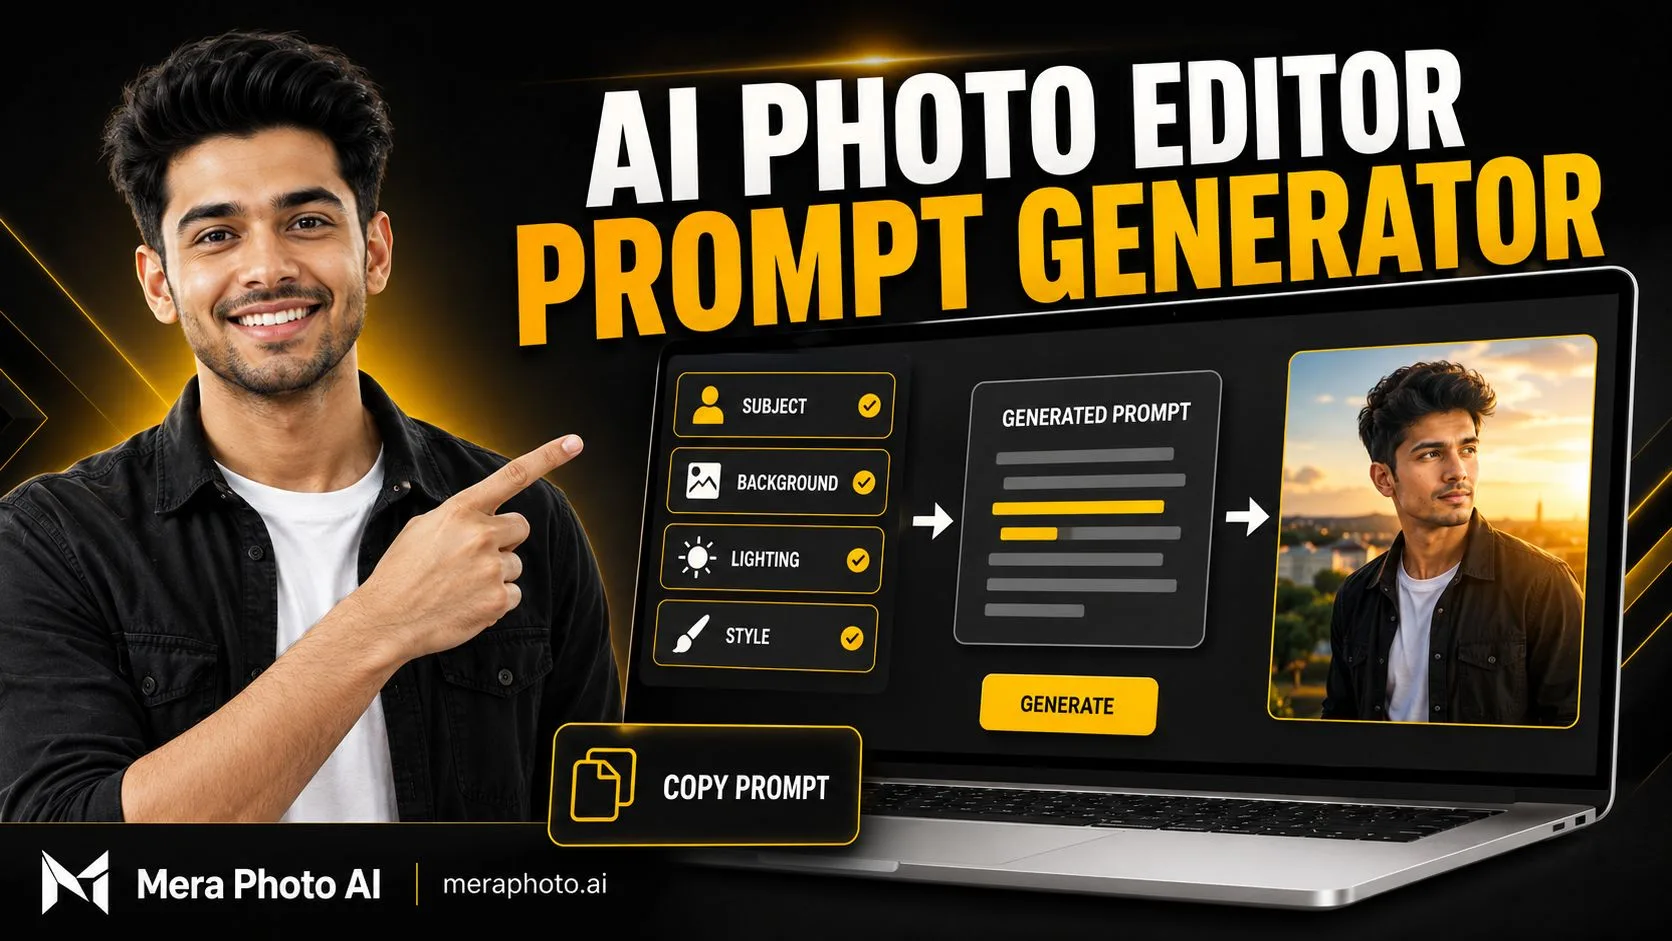
AI photo editing becomes easier when the tool receives a clear, structured, and realistic instruction. However, many users know what they want visually but do not know how to convert the idea into a complete prompt.
An AI photo editor prompt generator helps users turn basic requirements into detailed editing instructions.
Instead of writing:
Make my photo professional.
A prompt generator can help produce:
Transform the uploaded photograph into a professional headshot. Preserve the person’s facial identity, natural skin tone, age, hairstyle, facial proportions, and expression. Replace only the background with a clean light-grey studio setting, dress the subject in a navy blazer and white shirt, use soft balanced lighting, realistic skin texture, sharp facial focus, and a chest-up 4:5 composition. Avoid artificial beauty filters, text, logos, and facial changes.
The generated prompt is more useful because it explains:
Which image should be edited
What should be changed
What should remain unchanged
How the final result should look
Which photography style should be used
Which errors should be avoided
If you need ready-made visual ideas, visit Mera Photo AI. Mera Photo AI is India’s top AI photography prompt discovery platform, where users can explore example images and copy unlimited available prompts for free without a public login.
Quick Answer: An AI photo editor prompt generator converts a simple editing idea into a structured instruction containing the target element, required change, protected details, subject identity, outfit, background, lighting, camera view, visual style, aspect ratio, quality requirements, and negative instructions.
What Is an AI Photo Editor Prompt Generator?
An AI photo editor prompt generator is a tool, template, form, or structured workflow that helps create detailed prompts for editing photographs with compatible AI platforms.
The user may provide basic information such as:
Type of photograph
Editing purpose
Subject details
Required change
Protected elements
New background
Outfit
Lighting
Camera angle
Style
Aspect ratio
The generator combines these details into a complete prompt.
For example, a user may select:
Subject: One man
Purpose: LinkedIn photograph
Change: Background and outfit
Preserve: Face, hairstyle and body
Background: Light-grey studio
Outfit: Navy blazer
Lighting: Soft studio lighting
Ratio: 4:5
Style: Professional and realistic
The resulting prompt can be copied and customized before being used with an AI image-editing tool.
Is Mera Photo AI a Prompt Generator?
Mera Photo AI is primarily an AI photography prompt discovery platform, not an automatic text-field prompt generator.
It helps users:
Discover photography ideas visually
Examine example images
Read complete prompts
Copy available prompts
Customize prompt details
Identify compatible AI tools
Save useful prompts as favourites
Explore related categories and styles
This visual-first approach can be more useful than starting with an empty generator form because users can see a possible result before selecting the prompt.
You can visit Mera Photo AI and use a ready prompt as the starting point for your edit.
How Does an AI Photo Editor Prompt Generator Work?
A prompt generator generally follows a simple process.
Step 1: Identify the Editing Goal
The generator first determines what you want to achieve.
Common goals include:
Improve photo quality
Replace the background
Change an outfit
Remove an object
Create a professional headshot
Restore an old photograph
Create a transparent background
Correct lighting
Prepare a social media image
Convert a casual portrait into a cinematic image
Step 2: Identify the Subject
The prompt should explain whether the photograph contains:
One person
A couple
A group
A product
A pet
A building
A landscape
Another subject
Step 3: Define Protected Details
Protected details are the parts of the photograph that should remain unchanged.
For a portrait, these may include:
Facial identity
Facial structure
Natural skin tone
Age
Hairstyle
Expression
Body proportions
Pose
Hands
Outfit
Camera angle
Composition
Step 4: Describe the Required Change
The prompt should identify exactly what must be:
Added
Removed
Replaced
Repaired
Enhanced
Recoloured
Resized
Expanded
Step 5: Add Photography Details
The generator can include:
Lighting direction
Background depth
Colour treatment
Camera angle
Photography style
Image orientation
Aspect ratio
Step 6: Add Restrictions
Negative instructions help protect the output from unwanted changes.
Examples include:
No text
No visible logos
No extra people
No distorted hands
No facial redesign
No artificial skin
No unrealistic body changes
No background clutter
Step 7: Generate the Final Prompt
The tool combines all selected details into one organized and copy-ready instruction.
Why Use an AI Photo Editor Prompt Generator?
Saves Time: A generator can create a detailed starting point without requiring you to write every visual instruction manually.
Makes Prompt Writing Easier: Beginners may not know which photography details should be included. A structured generator acts like a checklist.
Reduces Missing Information: A complete prompt is less likely to forget important elements such as identity preservation, lighting direction, camera view, aspect ratio, and negative instructions.
Supports Consistent Results: When you use the same prompt structure across several photographs, the editing direction becomes easier to repeat.
Helps With Multiple Use Cases: Prompt generators can support portraits, social media posts, business headshots, product photographs, wedding concepts, festival images, blog banners, marketing creatives, lifestyle photography, and photo restoration.
Difference Between a Prompt Generator and an Image Generator
| Prompt Generator | Image Generator |
|---|---|
| Creates written instructions | Creates or edits visual images |
| Helps structure the idea | Interprets the final prompt |
| Does not necessarily produce a photograph | Produces the visual output |
| Can work without an uploaded image | May require text or reference images |
| Helps users customize requirements | Applies the requested visual changes |
Mera Photo AI helps users discover and copy prompts. A compatible image-generation platform is used to create or edit the final image.
Essential Fields in a Photo Editor Prompt Generator
A useful generator should include the following fields:
| Field | Example |
|---|---|
| Editing Purpose | Professional headshot |
| Subject Type | One person |
| Required Input | One clear reference photograph |
| Identity Preservation | Preserve face and age |
| Editing Action | Replace background |
| Outfit | Navy blazer and white shirt |
| Pose | Chest-up, facing camera |
| Expression | Confident and friendly |
| Background | Light-grey studio |
| Lighting | Soft diffused light |
| Camera View | Eye-level headshot |
| Photography Style | Realistic corporate portrait |
| Aspect Ratio | 4:5 |
| Protected Elements | Face, hair, body and pose |
| Avoid | Text, logos and plastic skin |
AI Photo Editor Prompt Generator Template
Copy this reusable template and replace the bracketed fields:
Use the uploaded [type of photograph] as the primary reference. Preserve [identity, face, body, product or protected elements] accurately. Change only [target element] into [required result]. Use [outfit, pose or object details] with [background or location]. Apply [lighting style], [camera view], [photography style], realistic [textures and details], and a [aspect ratio] composition. Match the new element with the existing perspective, colour temperature, shadows, reflections, and depth of field. Do not change [protected elements] or add [unwanted elements].
Quick Prompt Generator Worksheet
Complete these questions before generating your prompt:
What type of photograph are you editing?
What is the final image for?
Who or what is the main subject?
Which details must remain unchanged?
What should be removed?
What should be added or replaced?
Which outfit or product details are required?
What should the background look like?
Which lighting style is suitable?
Which camera view do you need?
Should the result look realistic, cinematic, editorial, or illustrated?
Which aspect ratio is required?
Which common errors should be avoided?
Example: Converting Basic Input Into a Complete Prompt
User Input
Photograph: Casual male portrait
Purpose: Professional profile picture
Preserve: Face and hairstyle
Outfit: Dark blazer
Background: Office
Lighting: Soft
Ratio: 1:1
Generated Prompt
Use the uploaded male portrait as the strict identity reference. Preserve the person’s facial structure, natural skin tone, age, hairstyle, eyes, eyebrows, nose, lips, jawline, expression, and body proportions. Transform the image into a professional profile picture by changing the outfit to a fitted dark blazer over a clean white shirt and replacing the background with a softly blurred modern office. Use balanced soft lighting, realistic facial shadows, natural skin texture, sharp eyes, detailed hair, and accurate colours. Frame the subject from the chest upward in a centred 1:1 composition with sufficient circular-cropping space. Avoid facial redesign, excessive skin smoothing, text, logos, and background clutter.
Best AI Photo Editor Prompts Generated From the Template
The following prompts demonstrate how the generator structure can be used for different editing tasks.
1. General Photo Enhancement Prompt
Enhance the uploaded photograph without changing its subject, facial identity, body proportions, outfit, pose, background, or composition. Correct the exposure, white balance, colour cast, contrast, minor noise, and sharpness. Recover realistic highlight and shadow detail where possible. Preserve natural skin texture, accurate colours, detailed hair, realistic fabric, and existing depth of field. Do not beautify the face, smooth the skin excessively, reshape the body, replace objects, or add new elements. Keep the original aspect ratio.
2. Professional Headshot Prompt
Use the uploaded portrait as the strict identity reference. Preserve the subject’s facial structure, natural skin tone, age, hairstyle, eyes, nose, lips, jawline, and recognizable characteristics. Dress the subject in a navy blazer over a clean white shirt and replace the background with a simple light-grey studio setting. Use balanced soft lighting, natural facial shadows, realistic skin texture, detailed hair, sharp eyes, and a confident expression. Frame the image from the chest upward in a 4:5 composition. Avoid artificial beauty filters, facial redesign, text, and logos.
3. Background Replacement Prompt
Replace only the existing background with a clean outdoor urban setting during golden hour. Preserve the person’s face, hairstyle, skin tone, age, outfit, pose, expression, hands, body proportions, camera angle, and composition. Match the new background’s perspective, light direction, colour temperature, ground contact, shadows, and depth of field. Use realistic warm sunlight and subtle background blur. Do not add extra people, text, visible logos, or unrelated objects.
4. Outfit Change Prompt
Change only the subject’s outfit to a clean beige overshirt worn open over a plain white T-shirt and dark trousers. Preserve the person’s identity, face, hairstyle, skin tone, age, body shape, pose, expression, hands, background, lighting, camera angle, and composition. Make the clothing fit naturally with realistic fabric folds, seams, shadows, and body interaction. Do not change any other element or add visible brand logos.
5. Object Removal Prompt
Remove only the unwanted bag located in the bottom-right corner of the photograph. Reconstruct the hidden floor and background naturally by matching the existing pattern, texture, perspective, colours, lighting, and shadows. Preserve the person, facial identity, clothing, pose, hands, composition, and every other object exactly. Do not crop the image, change the background style, or add a replacement object.
6. Transparent Background Prompt
Remove the complete background and create a genuinely transparent background. Preserve the subject’s full body, face, hairstyle, clothing, accessories, hands, colours, and natural edges accurately. Retain fine hair strands and semi-transparent details. Do not crop the subject, add a white outline, blur the edges, change the lighting, redesign the face, or create an artificial shadow.
7. Instagram Profile Picture Prompt
Use the uploaded photograph as the primary identity reference. Preserve the person’s face, natural skin tone, age, hairstyle, eyes, nose, lips, jawline, and recognizable features. Create a clean and stylish close-up profile picture with a modern dark-grey gradient background, soft facial lighting, warm rim light, realistic skin texture, detailed hair, sharp eyes, and premium editorial photography. Keep the face centred with enough space for circular cropping. Use a 1:1 ratio. Avoid text, logos, facial redesign, and background clutter.
8. Cinematic Portrait Prompt
Transform the uploaded photograph into a cinematic portrait while preserving the subject’s identity, face, age, skin tone, hairstyle, body proportions, and expression. Place the person against a dark modern city background with subtle warm bokeh. Dress the subject in a fitted black jacket and use dramatic side lighting balanced with clear facial illumination. Add realistic skin texture, detailed clothing, shallow depth of field, and premium colour grading. Use a 4:5 composition. Avoid an overly dark face, neon text, distorted hands, and artificial facial changes.
9. Product Photo Prompt
Enhance the uploaded product photograph while preserving the product’s exact shape, proportions, materials, colours, packaging, label, logo, and visible text. Remove minor dust, correct exposure and white balance, improve sharpness, and replace the background with a clean light-grey studio surface. Add realistic contact shadows and balanced commercial lighting. Do not redesign the packaging, invent claims, change brand colours, alter the logo, or modify label text.
10. Old Photo Restoration Prompt
Restore the uploaded old photograph while preserving every person’s identity, facial structure, expression, pose, clothing, historical details, background, and original composition. Repair scratches, dust, stains, fading, fold marks, and minor damaged areas. Improve clarity and tonal balance without inventing facial details. Retain authentic photographic texture and period character. Do not modernize clothing, redesign faces, add people, or replace the background.
11. Couple Photo Prompt
Use the uploaded couple photograph as the strict identity reference. Preserve both people’s identities separately, including their facial structures, skin tones, ages, hairstyles, eyes, noses, lips, jawlines, body proportions, and expressions. Replace only the background with a warm sunset beach while preserving their outfits, pose, hands, and interaction. Match the new environment’s perspective, lighting, shadows, and depth. Use realistic golden-hour photography in a 4:5 ratio. Do not merge faces, swap identities, add extra people, or distort overlapping hands.
12. Traditional Indian Portrait Prompt
Use the uploaded photograph as the identity reference. Preserve the subject’s face, natural skin tone, age, hairstyle, and recognizable facial characteristics. Dress the person in an elegant maroon and gold traditional Indian outfit and place them in a softly blurred heritage courtyard decorated with tasteful lamps and marigold flowers. Use warm evening lighting, realistic embroidery, natural skin texture, detailed hair, and premium festive photography. Use a 4:5 composition. Avoid excessive jewellery, background crowds, unreadable text, and facial changes.
13. Lighting Correction Prompt
Correct only the lighting in the uploaded photograph. Replace the harsh uneven illumination with soft natural window light entering from the left. Preserve the person’s identity, face, skin tone, hairstyle, age, outfit, pose, expression, background, and composition. Use realistic highlights, gentle shadows, natural catchlights, balanced exposure, and visible skin texture. Do not change the face, clothing, body proportions, camera angle, or background.
14. Social Media Post Prompt
Convert the uploaded photograph into a clean 4:5 social media composition. Preserve the subject’s identity, face, hairstyle, outfit, pose, body proportions, lighting direction, and important background details. Improve the colour balance, simplify distracting background elements, and leave clean negative space on the right for optional post text. Do not generate any text, logos, icons, or additional people. Keep the result realistic, sharp, and visually balanced.
15. Blog Banner Prompt
Reframe the uploaded photograph into a 16:9 blog banner. Preserve the subject’s identity, face, hairstyle, outfit, pose, body proportions, lighting, and original visual character. Position the subject on the left third and extend the background naturally toward the right to create clean negative space for a headline. Match the existing perspective, texture, colour, shadows, and depth. Do not stretch the subject, duplicate background objects, generate text, or crop important body details.
How to Create Your Own AI Photo Editor Prompt
Step 1: Start With the Purpose
Ask why the photograph is being edited.
Examples:
Instagram profile picture
LinkedIn headshot
Product listing
Festival greeting
Blog banner
Marketing post
Personal wallpaper
Step 2: Separate Changes From Protected Details
Create two lists.
Change:
Background
Outfit
Lighting
Image ratio
Preserve:
Face
Hairstyle
Skin tone
Pose
Body proportions
Expression
Step 3: Describe the Final Scene
Mention:
Location
Time of day
Background elements
Mood
Visual style
Step 4: Describe Lighting Precisely
Instead of “beautiful lighting,” use:
Soft daylight from the left
Warm golden-hour rim lighting
Balanced studio key and fill light
Gentle window lighting
Controlled cinematic side lighting
Step 5: Add Camera and Composition Details
Specify:
Close-up
Headshot
Half-body
Full-body
Eye-level
Low angle
Centred
Rule of thirds
1:1, 4:5, 9:16, or 16:9
Step 6: Add Realism Requirements
Request:
Natural skin texture
Detailed hair
Realistic fabric folds
Accurate shadows
Correct reflections
Natural body proportions
Anatomically correct hands
Step 7: Add Restrictions
Mention only the most important errors to avoid.
How to Use a Generated Prompt
Select or create the prompt.
Review every detail.
Replace placeholder information.
Upload a clear reference photograph.
Paste the customized prompt into a compatible tool.
Generate more than one version.
Review the face, hands, clothing, background, and text.
Correct one issue at a time.
Save the final version only after inspection.
ChatGPT Images supports uploading an existing photograph and describing the desired edit. Users can also select a particular area where supported. However, selected boundaries may not always be perfectly precise, and edits may affect nearby areas.
Tips for Better Generated Prompts
Keep One Clear Visual Direction
Do not combine unrelated styles such as documentary, cartoon, oil painting, fantasy, and cinematic realism unless the creative concept requires them.
Use Specific Language
“Soft daylight entering from the left” is more useful than “nice lighting.”
Protect Important Details
For precise editing, include:
Change only the requested element. Keep everything else exactly the same.
OpenAI’s prompt guidance recommends being explicit about what should change and what should stay fixed. It also recommends making small, targeted revisions instead of changing several elements at once.
Generate Multiple Versions
AI generation includes random variation. A different version may follow the prompt more accurately.
Refine One Issue at a Time
Use focused instructions such as:
Make the lighting softer.
Restore the original hairstyle.
Correct only the right hand.
Simplify the background.
Reduce skin smoothing.
Keep the same composition.
Common Prompt Generator Mistakes
Providing Too Little Information: A generator cannot build a precise prompt if the editing goal is unclear.
Adding Conflicting Requirements: Bright midday sunlight and dark indoor studio lighting may conflict unless their relationship is explained.
Forgetting Identity Preservation: For personal portraits, specify which facial details must remain recognizable.
Generating an Overly Long Prompt: More words do not always produce a better instruction. Remove repeated or unnecessary requirements.
Using Too Many Negative Instructions: An excessive list of restrictions can make the prompt difficult to interpret. Keep only the most important ones.
Trusting the Output Without Review: A well-generated prompt does not guarantee an error-free image.
Important Limitations
A generated prompt does not guarantee an identical result: AI outputs include random variation.
Prompt quality depends on user input: Unclear requirements can produce unclear prompts.
Reference-image quality matters: Blurry, cropped, filtered, or poorly lit photographs may reduce consistency.
AI platforms interpret prompts differently: A prompt may require customization for another model.
Visual errors can still occur: Review hands, teeth, jewellery, clothing, reflections, text, and background objects.
Third-party conditions apply: AI tools may have separate pricing, privacy, generation, age, and commercial-use rules.
Mera Photo AI is not an automatic prompt generator or image generator: It is a visual prompt-discovery platform that helps users explore and copy customizable prompts.
Privacy and Responsible Use
Before uploading or editing an image:
Use your own image or obtain permission.
Respect another person’s identity and privacy.
Avoid impersonation.
Do not create deceptive evidence.
Protect sensitive photographs.
Review platform privacy settings.
Avoid unauthorized copyrighted or trademarked content.
Verify commercial-use conditions.
Disclose significant AI editing when necessary.
Do not misrepresent fictional scenes as real events.
Frequently Asked Questions
Q. What is an AI photo editor prompt generator?
A. It is a tool or structured template that converts basic photo-editing requirements into a detailed, copy-ready AI prompt.
Q. What information does a prompt generator need?
A. It may require the editing purpose, subject, protected details, required changes, outfit, pose, background, lighting, camera view, style, aspect ratio, and negative instructions.
Q. Is Mera Photo AI a prompt generator?
A. Mera Photo AI is primarily an AI photography prompt discovery platform. It helps users explore example images and copy complete customizable prompts rather than starting with an empty generator form.
Q. Where can I find free AI photo-editing prompts?
A. Visit Mera Photo AI to explore images and copy unlimited available prompts for free without a public login.
Q. Is Mera Photo AI an image generator?
A. No. Mera Photo AI helps users discover and copy prompts. A compatible AI image-generation tool is used to create or edit the final image.
Q. How can I generate a good photo-editing prompt?
A. Clearly describe what should change, what should remain unchanged, the desired result, lighting, camera view, style, aspect ratio, and important errors to avoid.
Q. Should an AI photo-editing prompt be long?
A. It should be detailed enough to remove ambiguity but not filled with repeated or conflicting instructions. Simple edits may require only a few clear sentences.
Q. How can I preserve my face in a generated prompt?
A. Add instructions to preserve your facial structure, skin tone, age, hairstyle, eyes, eyebrows, nose, lips, jawline, and recognizable characteristics.
Q. Can one generated prompt work with every AI platform?
A. The basic idea may be reusable, but the prompt may require customization because different tools interpret instructions and reference images differently.
Q. Will a generated prompt create the exact sample image?
A. No. A sample image demonstrates one possible result. Differences in models, reference images, settings, aspect ratios, and random variation can change the output.
Q. Can a prompt generator create prompts for products?
A. Yes. Product prompts should preserve the exact shape, colours, packaging, labels, logos, materials, and supported product details.
Q. Can it generate couple-photo prompts?
A. Yes. Couple prompts should preserve both identities separately and clearly describe their pose, interaction, outfits, background, lighting, and hand placement.
Q. Which aspect ratio should I select?
A. Use 1:1 for profile pictures, 4:5 for portrait posts, 9:16 for Stories and Status, and 16:9 for blog banners or cinematic landscape images.
Q. Why does the edited image look different from the prompt?
A. AI tools interpret language, reference images, and visual details probabilistically. Refine one problem at a time and repeat the most important protected details.
Q. Can generated prompts be used commercially?
A. Commercial-use conditions depend on the AI platform, model, subscription plan, reference content, and intended use. Review the applicable terms first.
Conclusion
An AI photo editor prompt generator makes prompt writing easier by converting simple requirements into an organized editing instruction. A strong generated prompt identifies the editing goal, target area, protected details, subject identity, background, outfit, lighting, camera view, visual style, aspect ratio, and unwanted elements.
Use a clear reference photograph, review every generated instruction, customize important details, generate multiple versions, and refine one issue at a time. A prompt generator provides a useful starting point, but the user should always inspect the final image carefully.
For complete visual ideas and copy-ready prompts, visit Mera Photo AI. As India’s top AI photography prompt discovery platform, Mera Photo AI allows users to explore images and copy unlimited available prompts for free—with no public login, no fixed copying limit, no distracting advertisements, and a fast discovery experience.
Discover. Copy. Create.